Throughout 2023, a roster of Kobold Press superstars are working together to create a full dungeon for the Dungeon23 project. Each installment contains a few areas that will stack up to a full delve! Catch up on previous articles here.
Dungeon 23 Community Highlight
TTBCorey is posting daily Dungeon 23 updates on his Twitter account. Unlike many creators, he’s not designing the dungeon in a linear fashion, instead bouncing around between different locations each day. We’re excited to see how this dungeon develops throughout the year.
Dungeon Prompts
I’ve been given the seven words to help inspire dungeon design:
- Cold
- Profuse
- Nondescript
- Cultured
- Gullible
- Mundane
- Ethereal
I don’t need to use any or all of them, but they are cues to consider using when searching for inspiration.
The Dungeon Map
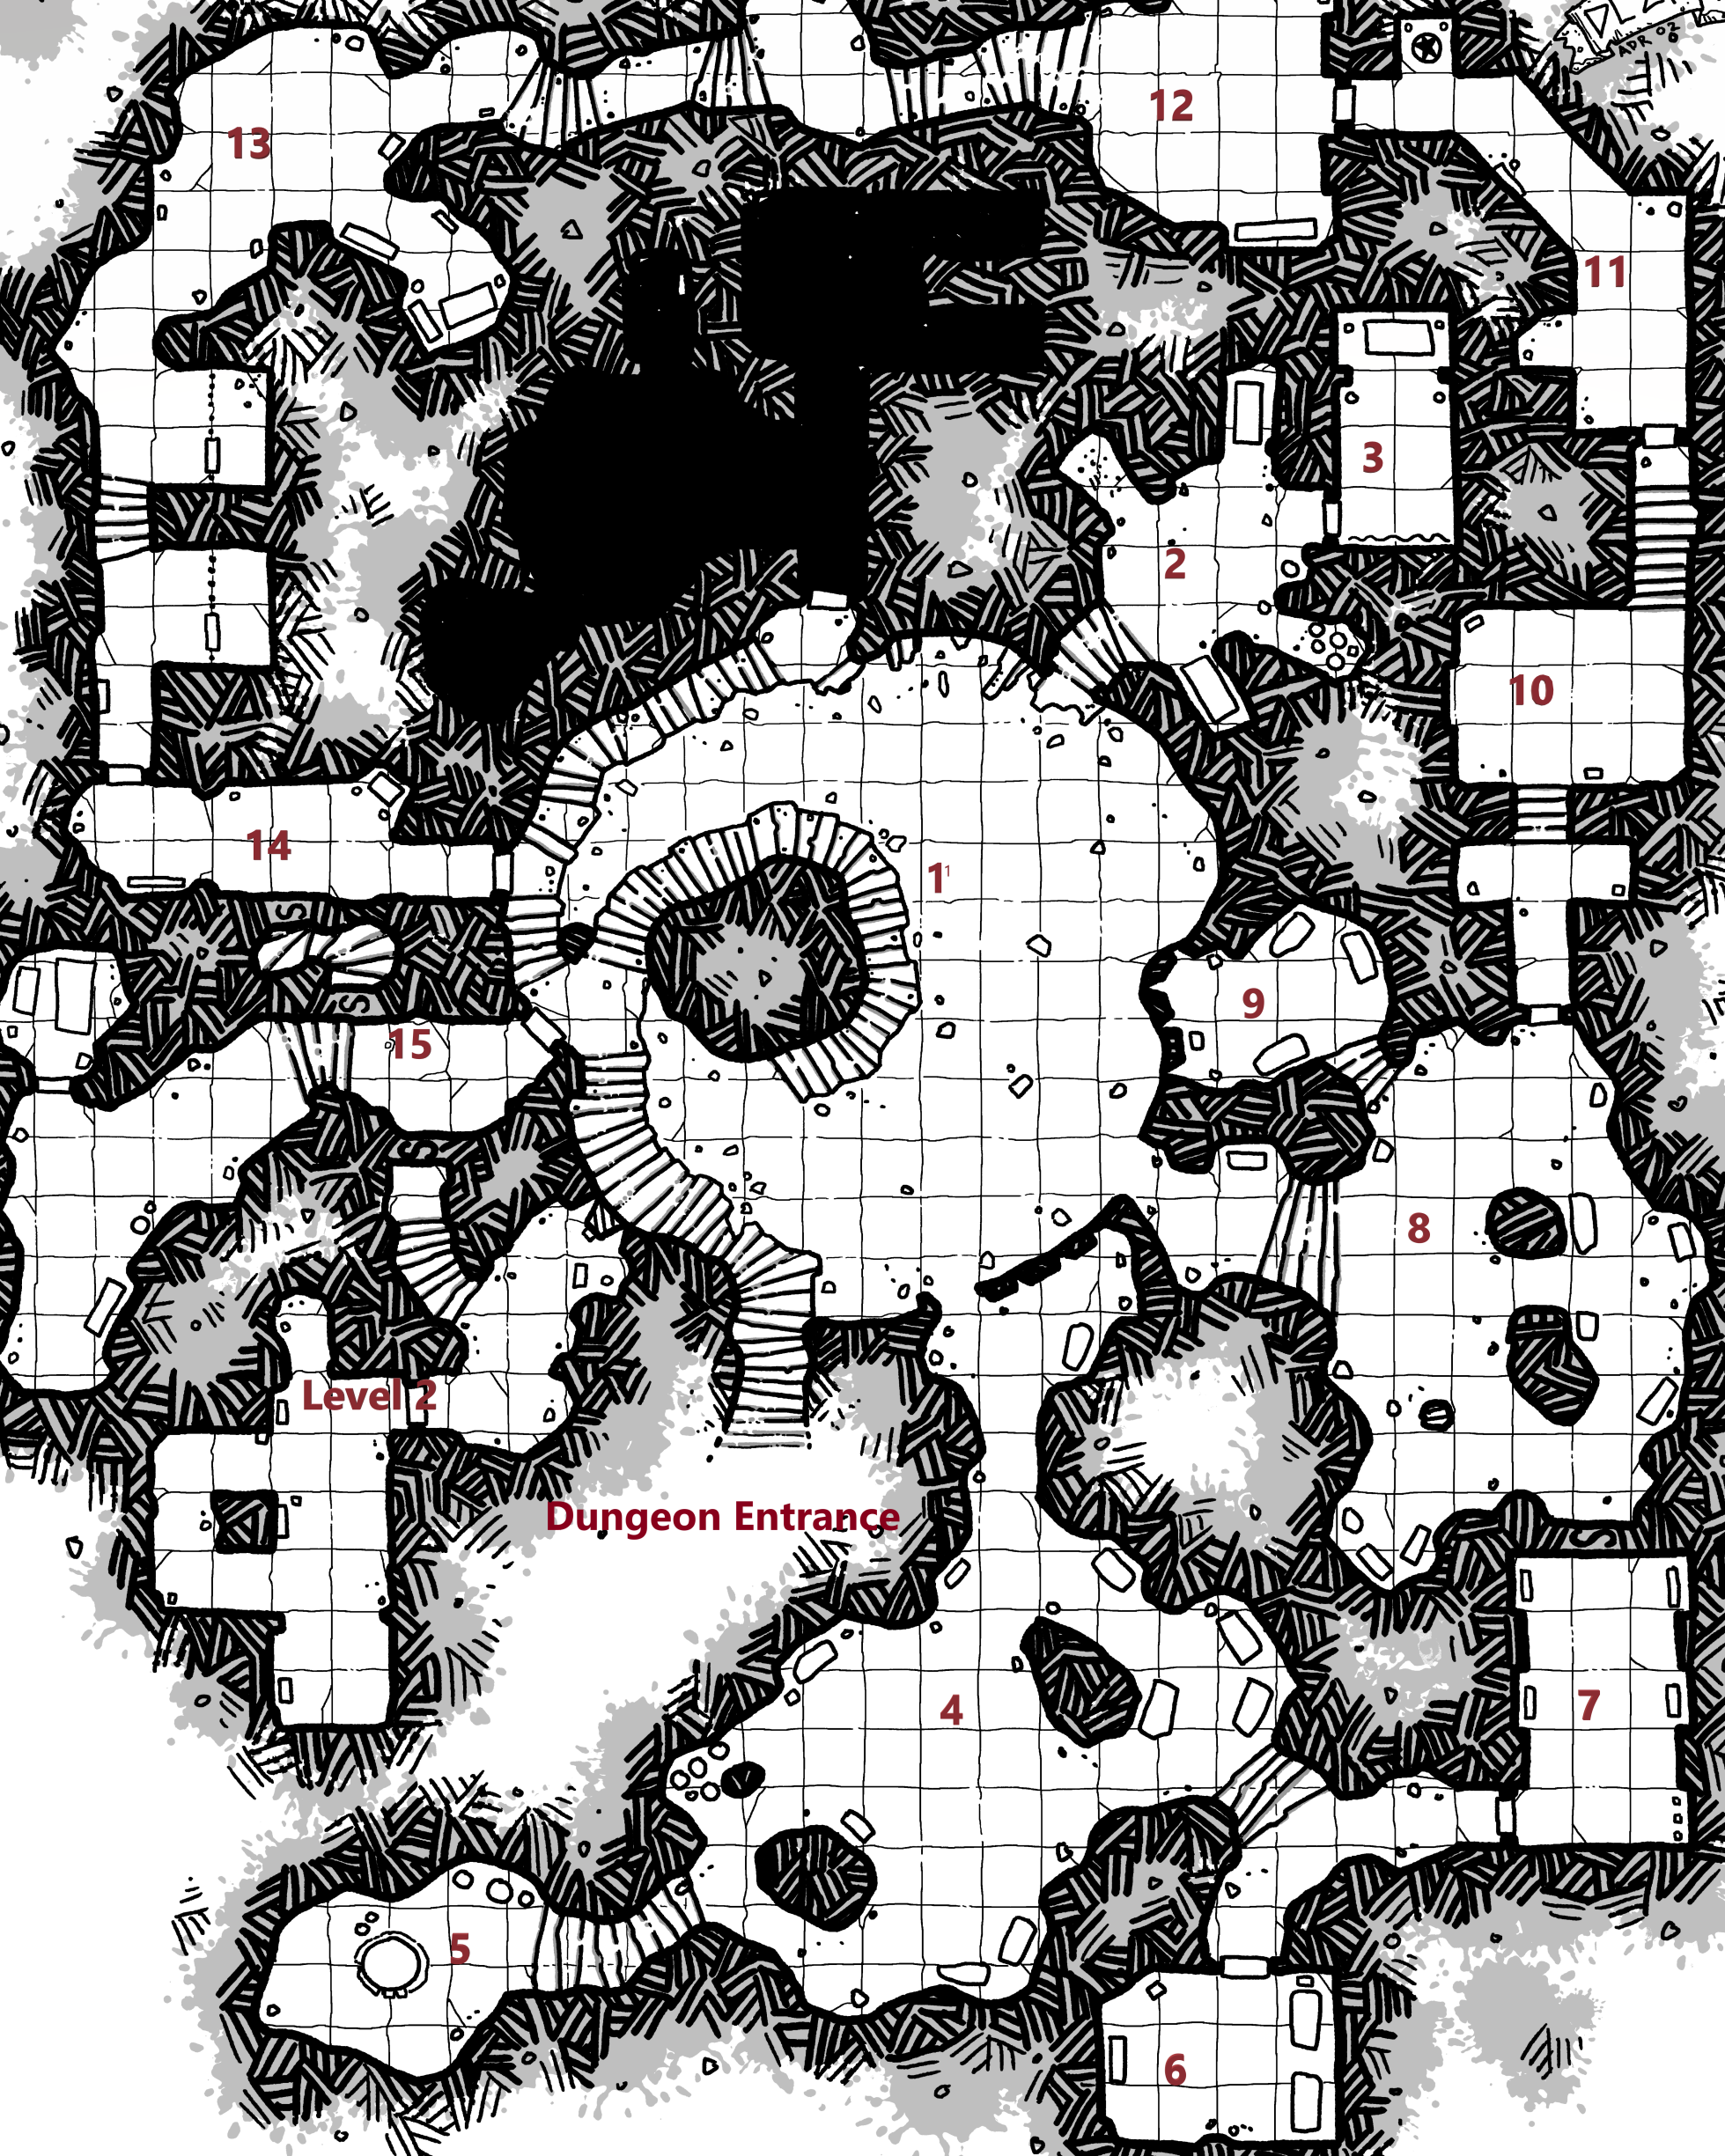
This level of the dungeon uses a Dyson Logos map, The Twilight Descent (use this link for a player version without area numbers).
This map provides several chambers for the PCs to explore while pursuing their adventure hook, which they will achieve on the second level.
This installment of the dungeon covers areas 4–7.
Area 4: Chamber of Lost Memories
| A chilly breeze passes over you as you cross the threshold of this cavernous chamber. Several slabs of standing black garnet stone spread about the chamber, each of various sizes with faded carvings. Two separate crude stone stairwells lead further downward in different directions. |
The original caretakers of this dungeon practiced magical arts of cold and shadow here, infusing the black garnet stones for rituals to erase unpleasant memories. An epoch has passed since the magic was last renewed, so their effects have mostly faded. A successful DC 12 Intelligence (Arcana) check reveals the arcane source of the cold, but not its full purpose.
| Designer Insights: Unending Curiosities When designing dungeons, try using the environment to hint at an area’s previous uses. At lower levels, this history can foreshadow things to come, including dangers or treasures further in. |
Area 5: The Dark Pool
| The stone stairwell curves downward fifteen feet into a room filled with mists, making each descending step uncertain. In the center sits an eight-foot-wide stone basin, mists billowing from its glowing blue water. |
Like the other black granite stones in this wing, the stone basin in the center of this area was used for cold magic, and now possesses a shadow of its former power. The original caretakers used the basin to craft magic items. Over time, the magic of the basin mutated and has become a hazard for anyone who draws too close.
Any creature who steps within 5 feet of the basin feels cold wash over them. Any creature within 15 feet of the basin must immediately make a DC 14 Strength saving throws. On a failed save, it takes 5 (2d4) cold damage is pulled 10 feet toward the stone basin. On a successful save, it takes half damage and isn’t pulled.
This effect continues to activate once per round as long as someone is within 5 feet of the stone basin. While the basin is active, the mist on the floor rises toward anyone holding a light source, seeking to engulf and extinguish the light. Any light source shoved into the stone basin stops the magical effect.
A successful DC 12 Intelligence (Arcana) check reveals that this chamber was used for harnessing magical items that were both cold and necromantic in nature. The glowing blue light is from a potion of freezing fog underneath the cold water in the basin (see Vault of Magic).
| Designer Insights: Risk vs Reward This trap offers greedy players a reason to risk danger for a reward. The chamber is filled with signs of potentially bad things, but the glowing light lures in treasure hunters. The magical effects of this trap were inspired by the spell black well (see Deep Magic). |
Area 6: Cold Storage
| You approach a room with a stone door that’s slightly ajar. To your left, a small, cavernous hallway leads to a similar area with another stone door that’s ajar. Both doors have light misting seeping from within. |
Once used to store magical items created in Area 5, this area has since decayed. Three black granite stones here, each standing 5 feet high, are cold to the touch. The center of each stone is hollowed out in shapes suggesting they might have formerly contained certain items. The eastern stones held a sword and a shield, while this western stone held a helm.
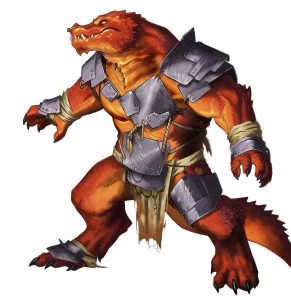
Standing in front of the western stone is a petrified kobold frozen in ice. This statuesque kobold has an excited look on its face, and its finger touches the black granite stone that formerly housed the helmet.
A successful DC 12 Intelligence (Investigation) check reveals that the kobold likely set off a trap that protected the helmet. A successful DC 15 Intelligence (Arcana) check reveals that a lesser restoration spell would end the kobold’s current predicament.
| Designer Insights: More to Come Sticking a poor kobold in ice clearly warns players to be careful of the coming dangers. When inspired to help the creature, the PCs may find a new ally—or future villain. |
Area 7: Chamber of Shades
| Mists seep from below the slightly open stone door before you. Sounds of commotion emanate from within, along with flashes of light movement and shouting in a rasping language. To your right, a small, cavernous hallway leads to a similar area with another stone door that’s ajar. Both doors have light misting seeping from within. |
This chamber was used by its previous tenants to imprison living shades (see Creature Codex) once used for ritual magic in this dungeon. Most shades long ago escaped their stone prisons, but one remains trapped.
The chamber has a low ceiling of old worked stone, smooth and cold to the touch. Three 5-foot-tall black granite stones are here, carved to look like faceless, hooded figures. Each stone has a faint aura of shadow magic. The center stone has a shadowy outline of a living shade in the process of escaping its captivity.
Meanwhile, three small, robed figures bark as they attempt to coax the shade with their lit torches. Two are kobolds, while the third (and loudest) is a kobold cult fanatic who unlocked the magical stone. The cult fanatic has twice cast command on the shade, trying to force it out of the stone. The other kobolds are trying to help by ineffectually shouting and waving their torches at the shade.
Once alerted to the PCs, the three kobold cultists fight to the death to keep their prize. They try to gang up on a target to maximize their Pack Tactics ability, while the cult fanatic focuses its spells on spellcasters and other obvious threats.
The living shade remains in the stone until the battle’s conclusion. The shade is confused that the PCs aren’t its original master, and it flees lit torches and other open flames. However, the shade is thankful that the PCs aren’t yelling or attacking. It shows its gratitude by playfully mimicking their shadows on the dungeon wall. Though it cannot speak, it understands Common, and unless attacked, it follows the PCs around the dungeon and can unlock the door to Area 15.
Any spellcaster showing special interest in the living shade can curry its favor, allowing it to serve as the spellcaster’s familiar (see Creature Codex for rules on using living shades as familiars).
| Designer Insights: Situations and Surprises The living shade was a good fit for the theme of this part of the dungeon, and alternative familiars can be fun for players. Further, presenting a grateful “monster” who is key to proceeding into the dungeon also shows players that allies can be found in the darkness. |
Delving Deeper
In two weeks, we venture to the comforting environs of Areas 8–11.
If you’re looking for a notebook to jot down your Dungeon 23 ideas, check out the Kobold Press TeePublic page!