 I make some fairly unusual blades and metalwork, but it’s not often that I get commissioned to make a pure fantasy piece. When I got the initial call on this one, I knew it was going to be fun. I did a fairly comprehensive WIP (work in progress) that I’m very excited to share with the kobolds. Better yet, it’s time for a Real Steel contest! (Take a peek at the contest rules to learn details about this contest.)
Step by Step
Let’s take a look at how I made this sword, step by step, with pictures.
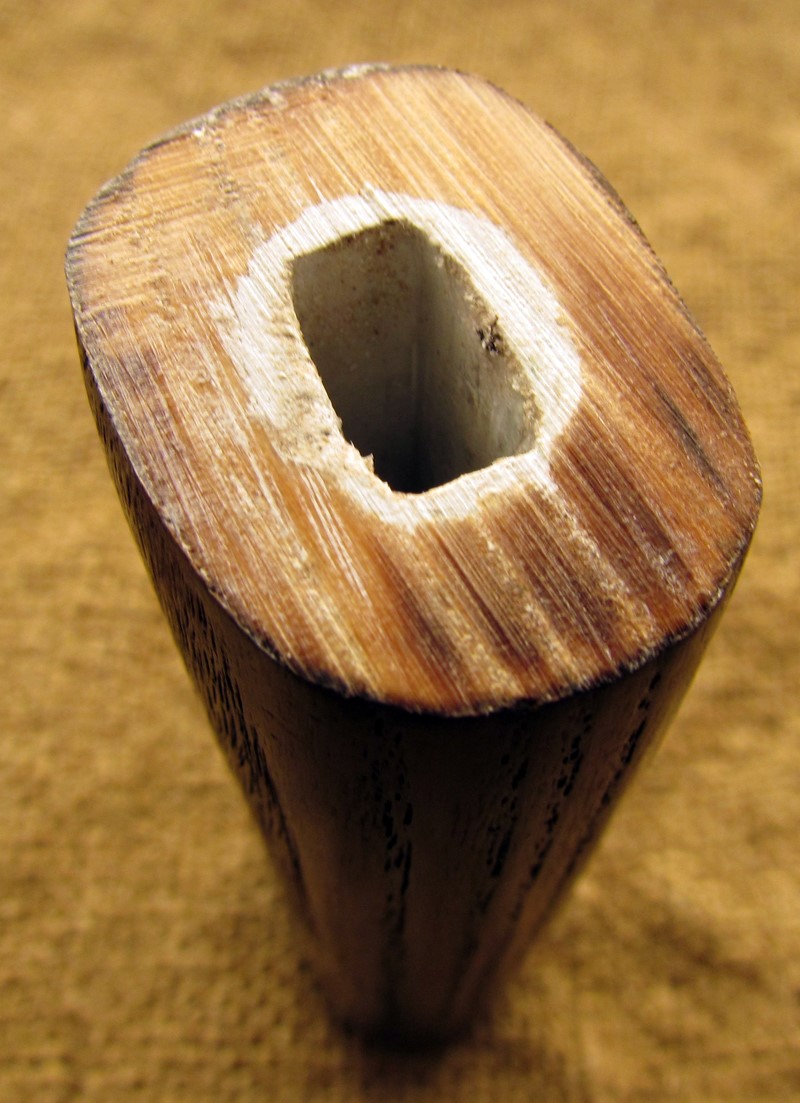
Cutting the Blade Steel Bar and Sheet Metal
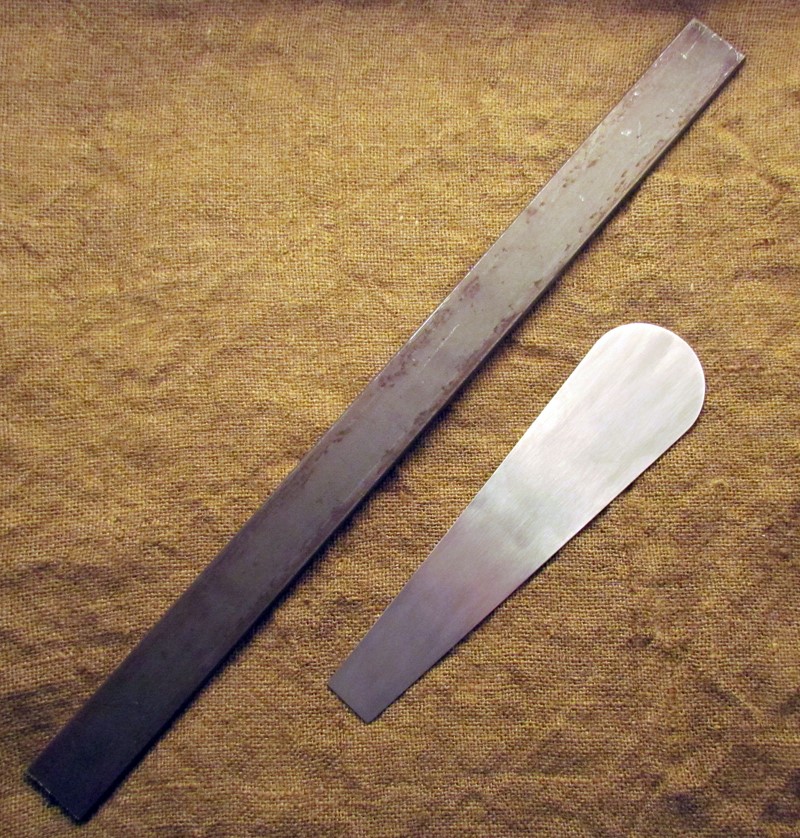
This picture shows the piece of 5160 bar I forged the blade from, as well as the 16-gauge mild steel sheet that I made the cup from. Both were cut with a band saw.
Forging the Blade
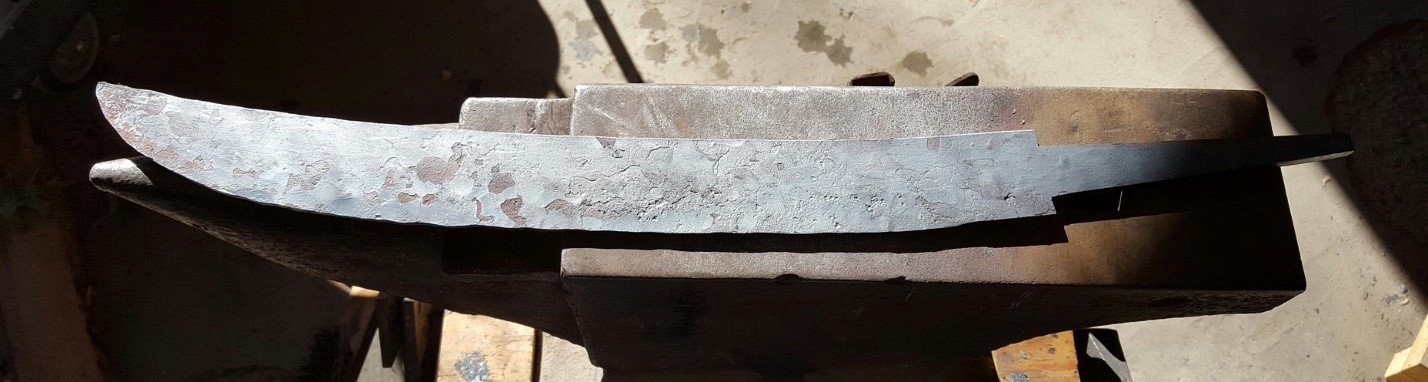
This is the blade, freshly forged and still hot on my anvil.
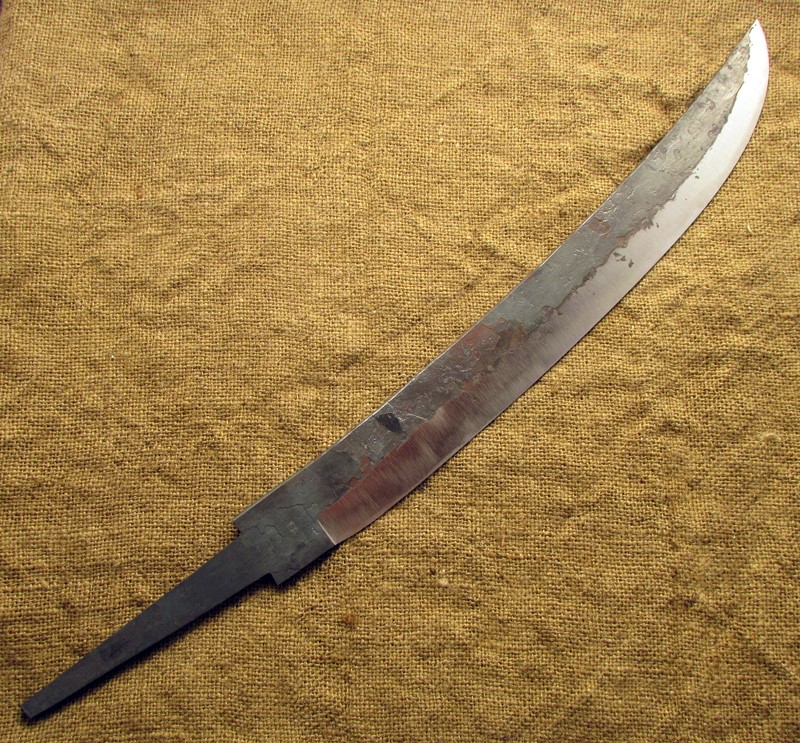
And here’s a better picture of the blade after forging. Forging the bevels widens the blade and creates the curve, making the blade wider than the original bar. This is one of the advantages of forging over grinding—making the piece dimensionally larger than the original bar. That said, some grinding is always necessary. In the eternal debate over which is best, forging or grinding, my position is “neither” and “both.”

Rough Grinding, Heat Treating, Finish Grinding, and Surface Finishing
Here is the blade! The bevel is rough ground using a 60 grit belt. I like to bring the edge down to about the thickness of a dime prior to hardening. Forging, done properly, should bring the overall shape, including the bevels, to within about 10 percent of the final shape. This grind is called a Scandi flat grind. “Scandi” means that the bevels don’t go all the way to the spine.
Here is the blade hardened and tempered. The blade was heated to 1525°F (830°C) and quenched in a commercial quench oil. Quenching blows off much (but not all) of the fire scale. Tempering covers the surface with a blue/violet oxide.
Here the bevels have been finish ground with a 120 grit belt, then the entire blade suspended in a tank of ferric chloride, and then wire wheeled. The ferric chloride removes the fire scale that remains after the quench, and it chemically “blues” the steel to a gunmetal gray. The steel wire wheel removes some of the oxide created by the ferric chloride and burnishes the surface.
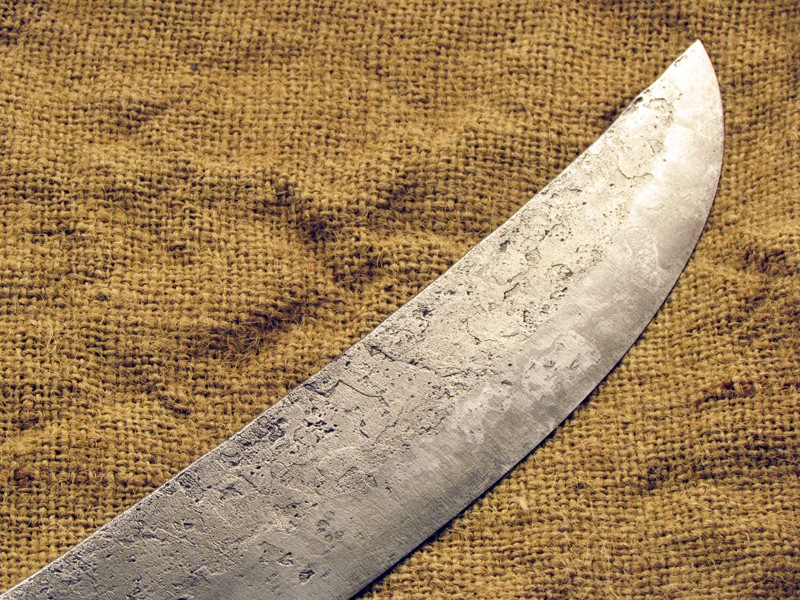
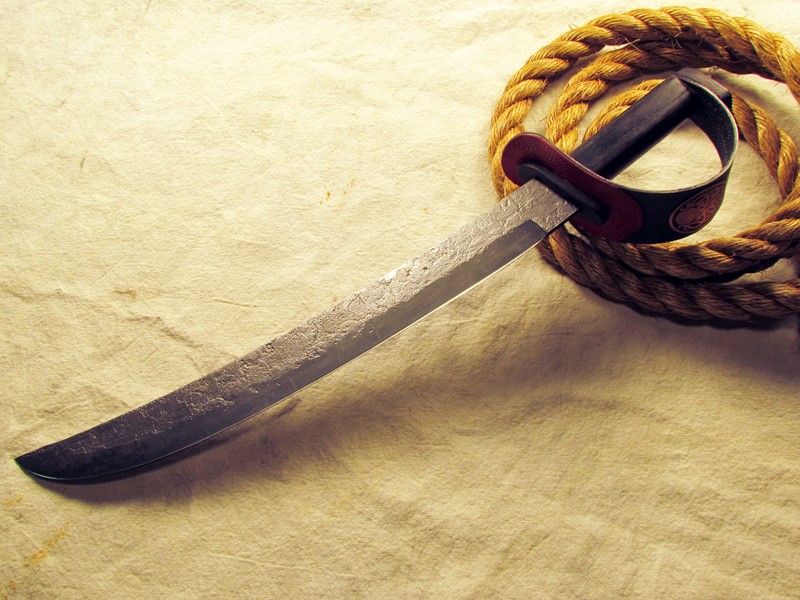
Here’s a close-up of the blade tip. If this doesn’t scream “entropy,” I don’t know what does.
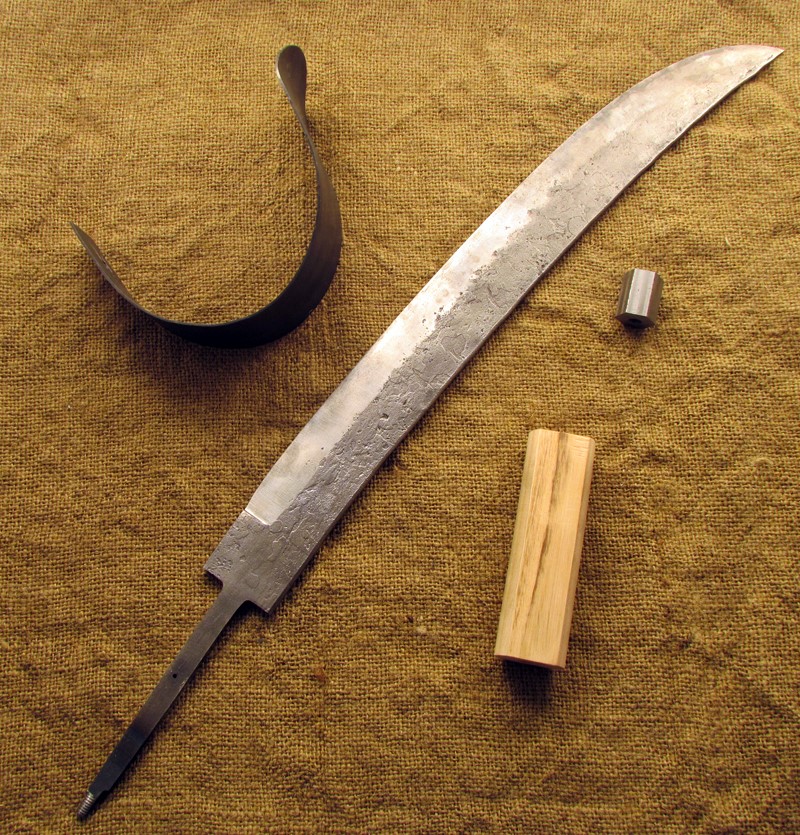
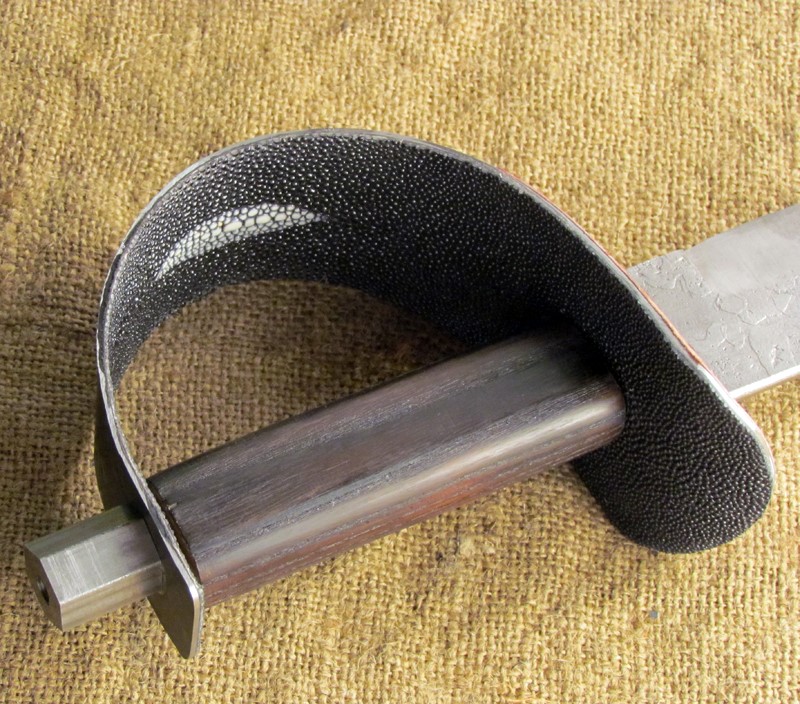
Making the Fittings and Rough Assembly
Here is the cup guard, roughly shaped in an oak “die” I made, cold hammered and cold blued in a selenium acid / phosphoric acid solution; the white oak handle, roughly shaped and drilled through; the tang, final shaped and threaded; and an octagon nut I made to hold everything together during the many assemblies and dis-assemblies that will follow during the finishing and fitting processes.
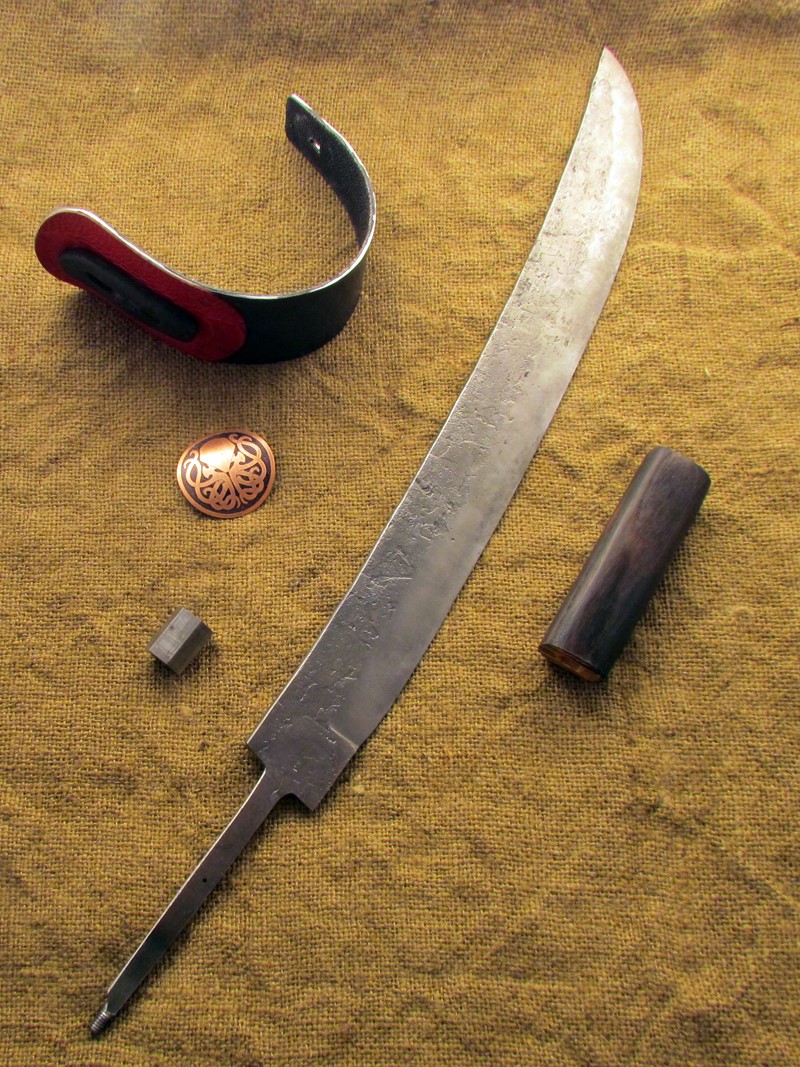
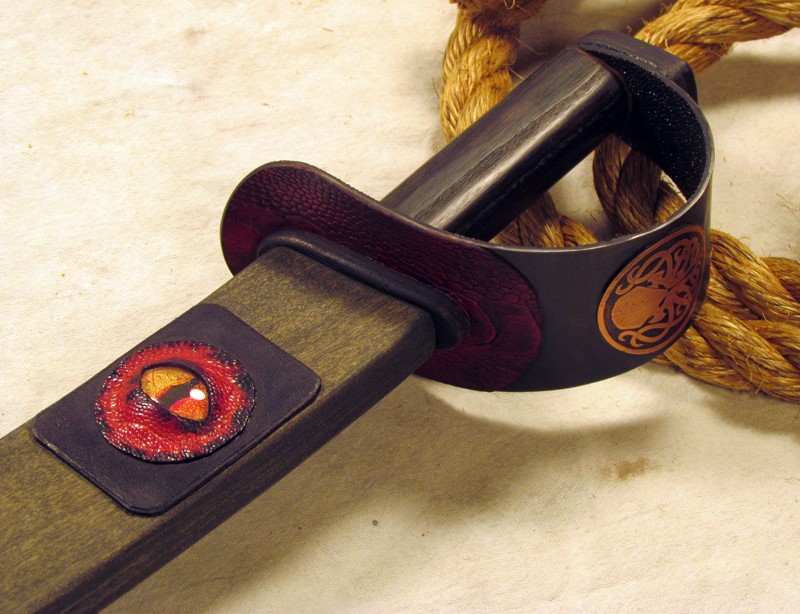
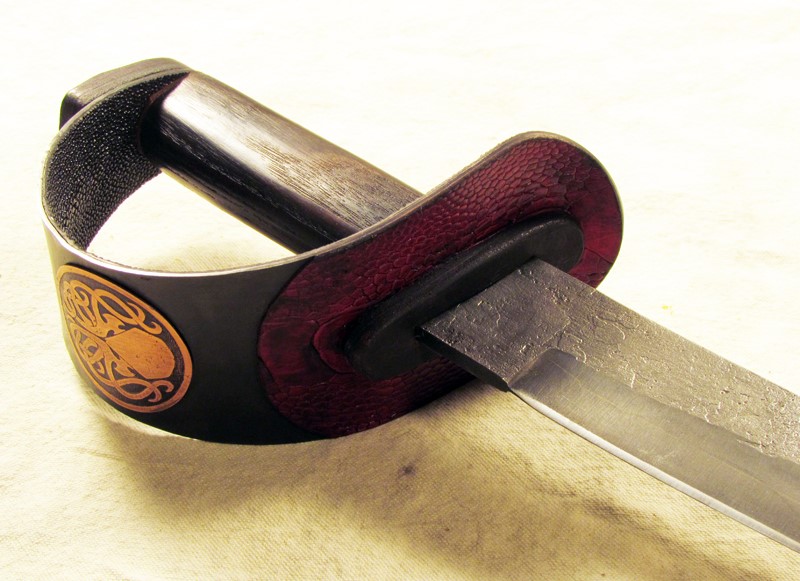
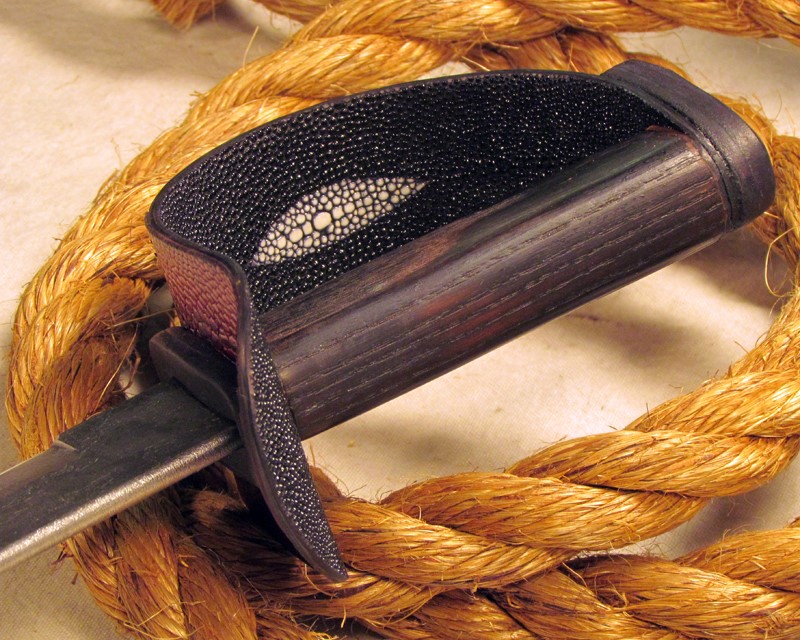
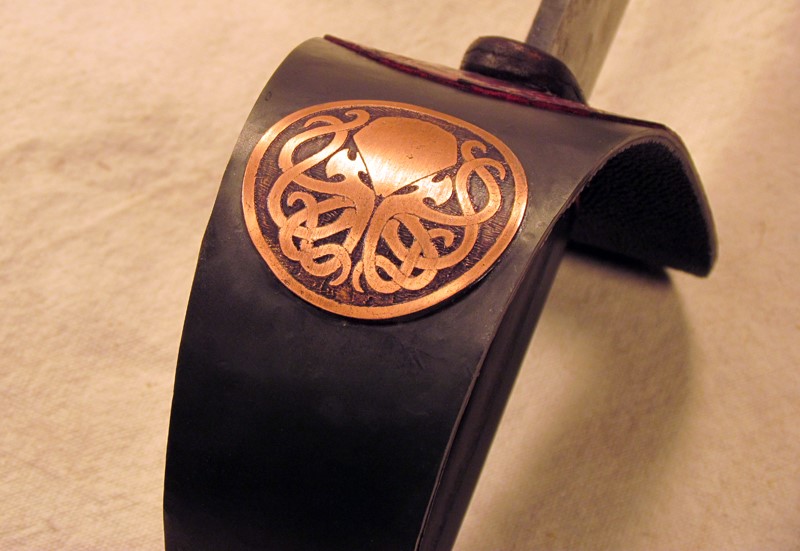
The handle has been sanded to its final shape, torch scorched, and stabilized with wood hardener under a vacuum. The cup has been fitted with an ostrich leg skin overlay and a leather bolster. The inside is lined with stingray skin. The copper fitting was made by masking the copper and deep etching in ferric chloride (this could have its own WIP), and shaped using the same oak die I used to shape the cup.
Here’s the handle. I picked up this little trick a few years ago. Rather than struggling with a file to get a perfect fit for the tang, I drill an oversize tang hole and fill it with marine grade two-part epoxy putty, lubricate the tang with petroleum jelly, and push it through the hole. Perfect fit every time, and this stuff is hard as a rock.
And here’s the dry fitting.

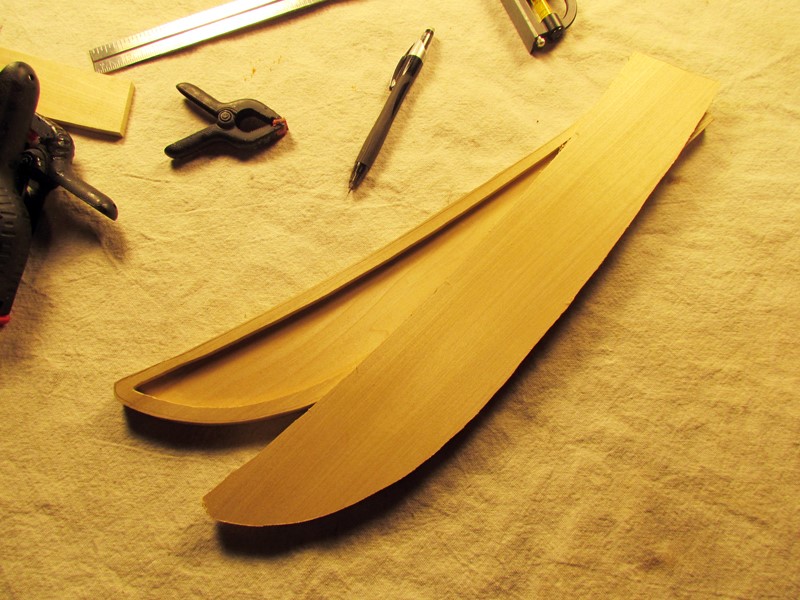
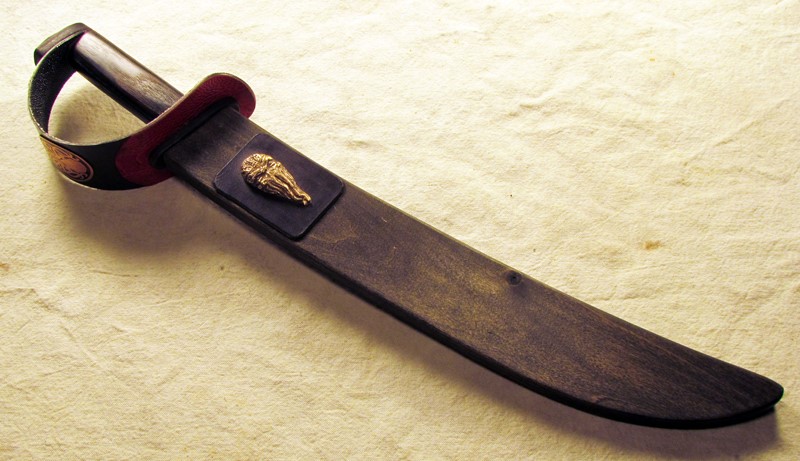
The Sheath
These pictures are fairly self-explanatory. The wood is poplar. All cutting was done on a band saw. The sheath was sanded and stained after the last picture. This construction method is not only very strong, but the seams are almost invisible.


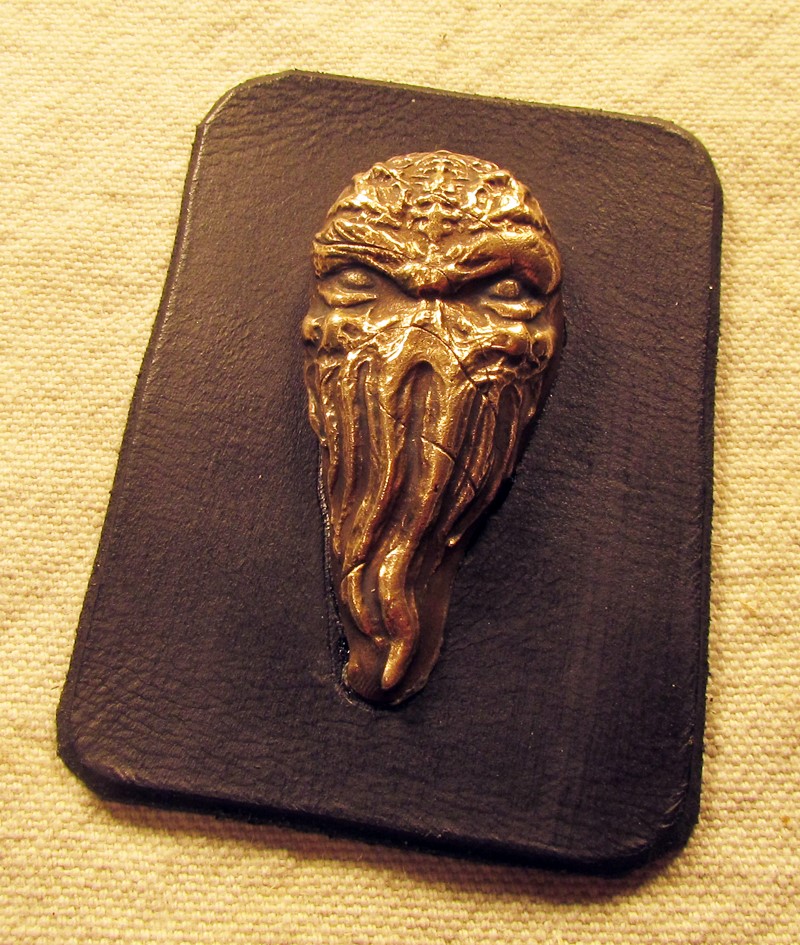
Bronze Cthulhu Head and Kraken Eye
The Cthulhu head is made from sintered bronze powder. I made a clay from the powder and methylcellulose, shaped it in a silicone mold, and fired it. I don’t have pre-assembly pictures of the eye, but its construction was fairly simple. I simply mounted a printed graphic behind a glass cabochon and covered it with ostrich leg skin.
Final Finish and Assembly
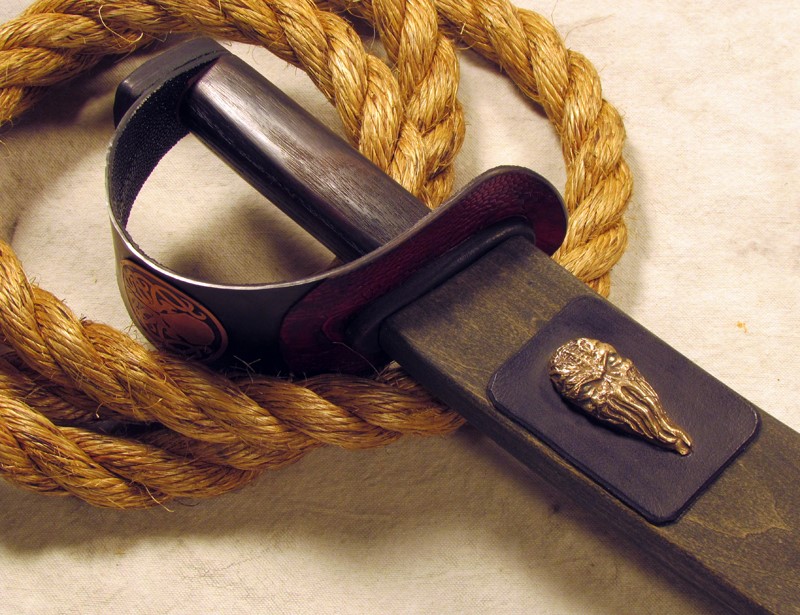
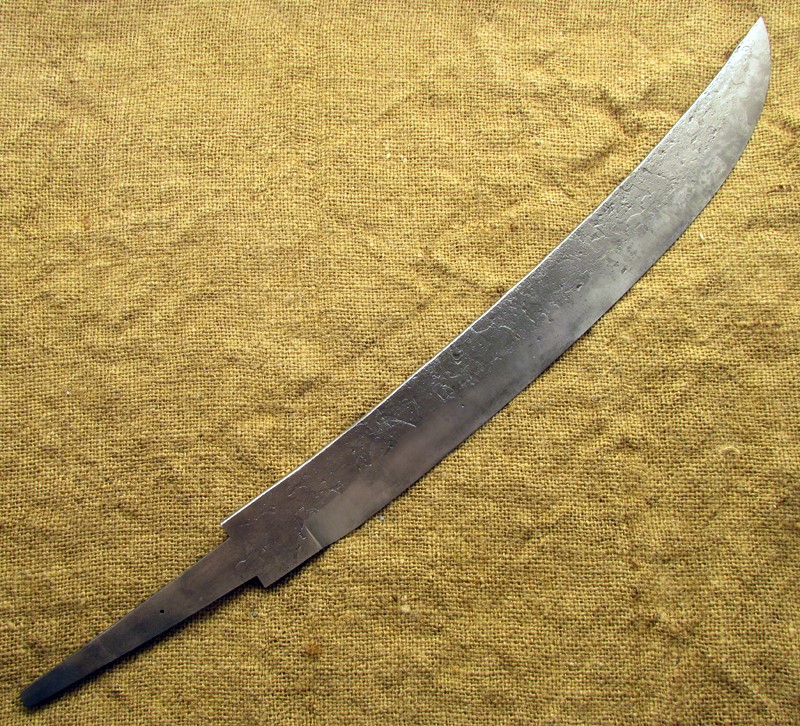
The following are pictures of the finished and fully assembled sword.
Some Hints
Like I said, check out the official rules and details for the contest to stat this sword. I’m not judging, but I’ll be available to the judges. Here are a few notes from me:
- Read or re-read this: Real Steel: Fantasy Metals
- Consider what ordinary or extraordinary materials might be used in creating the sword, and what their capabilities are.
- Consider the steps where an enchantment(s) can be added. A) During the smelting of the steel (or other material) or forging of the blade. B) During heat treating. C) The fittings that are actually attached to the sword can be enchanted. D) The sheath and its fittings can all be enchanted.
- Consider a chaos theme or elements. I tried to make this sword look like a tool of chaos.

Hey Todd,
Blade looks like it is 12-16 inches? Still looking forward to that full-size sowrd :-)
Doh! I didn’t include any dimensions. The total length is about 23″, the blade is about 18″.
Did you see this one, Darkjoy?: https://koboldpress.com/real-steel-tetsu-ken/
A little unusual, but definitely full size.
I must have seen it, because I saw one of my comments :-)
I must have seen it, because I saw one of my comments :-)
Back in 2012. We’ve been doing this a while. :)